

RailsAPIさくらのVPSで公開したいんだけどできる?
できますよ!

この記事ではさくらのVPSを使ってRailsアプリケーションを公開する方法について書いていきます。
この記事でやること
- さくらのVPSでサーバーを立てる
- Nginxをインストール・設定する
- MySQLをインストール・設定する
- ローカルのRailsアプリをアップロードする
- Unicornをインストール・設定する
もちろんこの記事で書く以外にも方法はいくらでもあるので、参考程度にしてみてください。ちゃんとRailsのアプリを公開したことがないので変な部分もあるだろうと思います。
Railsアプリケーションを公開していきましょう。
公開するRailsアプリケーション
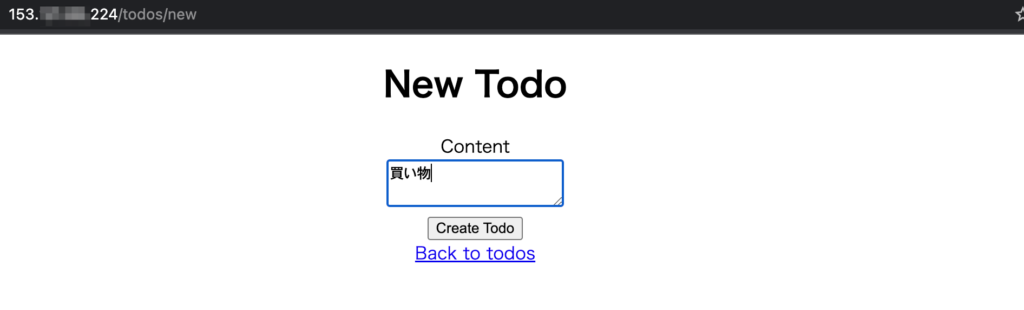
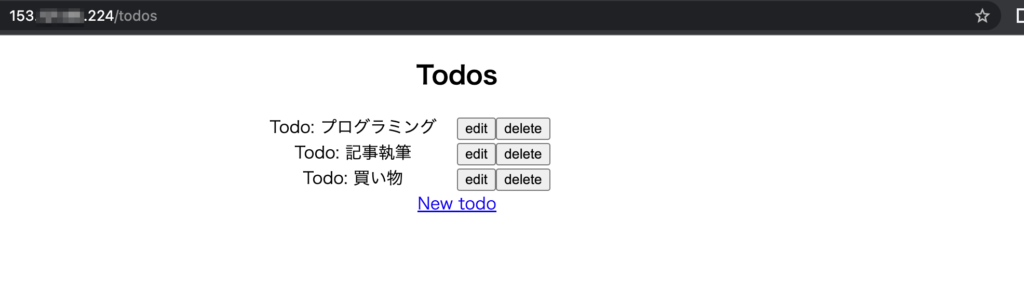
今回さくらのVPSで公開していくアプリケーションはただのTodoアプリです。
なんのデザインもないアプリケーションだけど、公開できるのか試していきます。
さくらのVPSでRailsアプリを公開する手順
今回公開するにあたってこんな流れでいきます。
- サーバーを立てる
- Nginxをインストールする
- MySQLをインストールする
- ローカルのアプリをアップロードする
- Unicornをインストール・設定する
動かす際にはNginxとUnicornを繋いで動かしていきたい。その他諸々の設定もあるのでやっていきましょう。
さくらのVPSでサーバーを立てる
さくらのVPSでサーバーを立てる際には申し込み画面に従っていけば、簡単にできます。今回サーバーは1GBでUbuntuにしました。

ちなみにさくらのVPS![]() は2週間無料で使えるので、試したい場合は使ってみるといいですよ。
は2週間無料で使えるので、試したい場合は使ってみるといいですよ。
-

-
【さくらのVPSの始め方】申し込んでサーバーを立ててみる
2022/8/6
そんなやり方をこの記事では紹介します。さくらのVPSを使う際にどう申し込めばいいのか画像を交えて書いていきます。 さくらのVPSを使ってサーバーを立てることに興味があったら参考にしてみてください。 さ ...
SSH接続する
作業はSSH接続してやりたいのでSSH接続します。Ubuntuの場合は初期ユーザー名がubuntuですね。
$ ssh ubuntu@ipアドレス
# パスワードが問われるので、設定したパスワードを入力してログイン-

-
さくらのVPSでSSH接続する方法を紹介します。
2022/8/8
そんな疑問を解消するために、この記事ではさくらのVPSで立てたサーバーにSSH接続する方法を書いていきます。 さくらのVPSでサーバーを立ててSSH接続したい方は参考にしてみてください。 さくらのVP ...
Rubyインストール
rbenvを使ってrubyをインストールします。
# パッケージを最新に
$ sudo apt update
$ sudo apt upgrade

# 諸々入れる
$ sudo apt install make gcc libssl-dev zlib1g-dev


# rbenv
$ git clone https://github.com/rbenv/rbenv.git ~/.rbenv
$ cd ~/.rbenv && src/configure && make -C src
$ echo 'export PATH="$HOME/.rbenv/bin:$PATH"' >> ~/.bashrc
$ echo 'eval "$(rbenv init - bash)"' >> ~/.bashrc
$ source ~/.bashrc


# ruby-build
$ git clone https://github.com/rbenv/ruby-build.git "$(rbenv root)"/plugins/ruby-build
# 設定内容確認
$ curl -fsSL https://github.com/rbenv/rbenv-installer/raw/main/bin/rbenv-doctor | bash

# rubyインストール
$ rbenv install --list
$ rbenv install 3.1.3
$ rbenv global 3.1.3
$ ruby -v
ruby 3.1.3p185 (2022-11-24 revision 1a6b16756e) [x86_64-linux]rubyのバージョンはローカルで使っていたバージョンと合わせるといいですよ。
Nginxをインストールする
WebサーバーにはNginxを使いたいので、インストールします。
# パッケージを最新に
$ sudo apt update
$ sudo apt upgrade
# nginxをインストール
$ sudo apt install nginx
# nginxステータスの確認(ActiveだったらOK)
$ systemctl status nginx
● nginx.service - A high performance web server and a reverse proxy server
Loaded: loaded (/lib/systemd/system/nginx.service; enabled; vendor preset:>
Active: active (running) since Fri 2022-12-02 07:25:34 JST; 8s ago
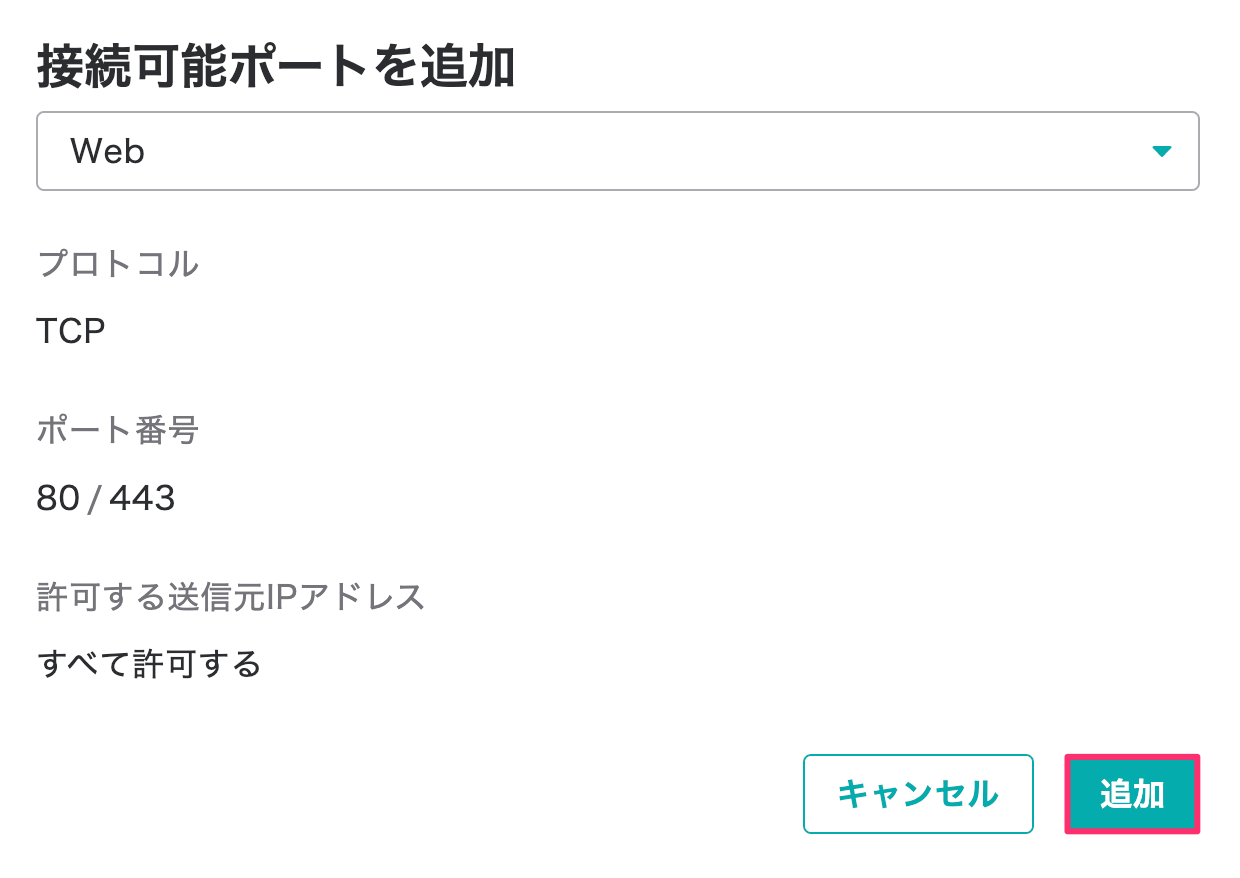
Docs: man:nginx(8)これでブラウザからサーバーのIPアドレスにアクセスすれば、Nginxの初期画面が表示されるはずです。たださくらのVPSのパケットフィルターを使っている場合は、80番ポートを許可してやらないといけないのでやっていきましょう。
パケットフィルターで80番ポートを許可する
管理画面からパケットフィルターを設定します。
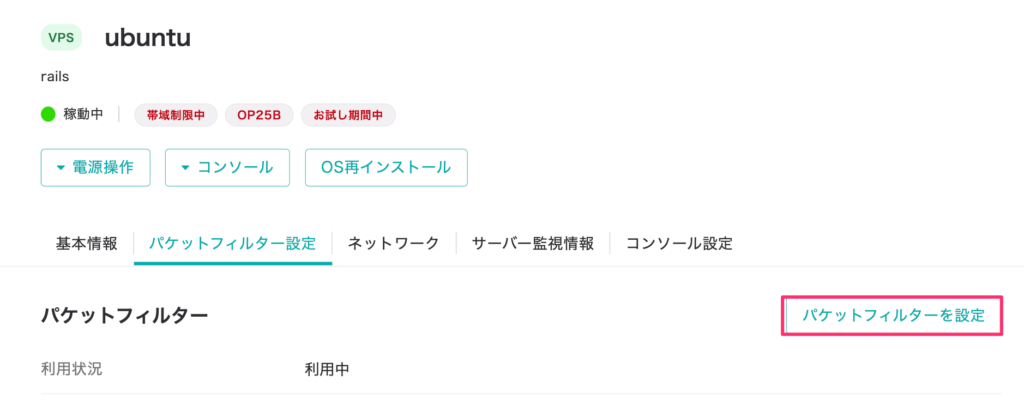
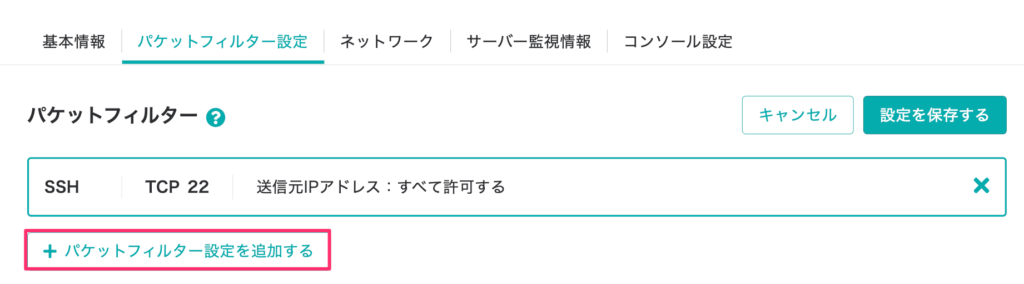
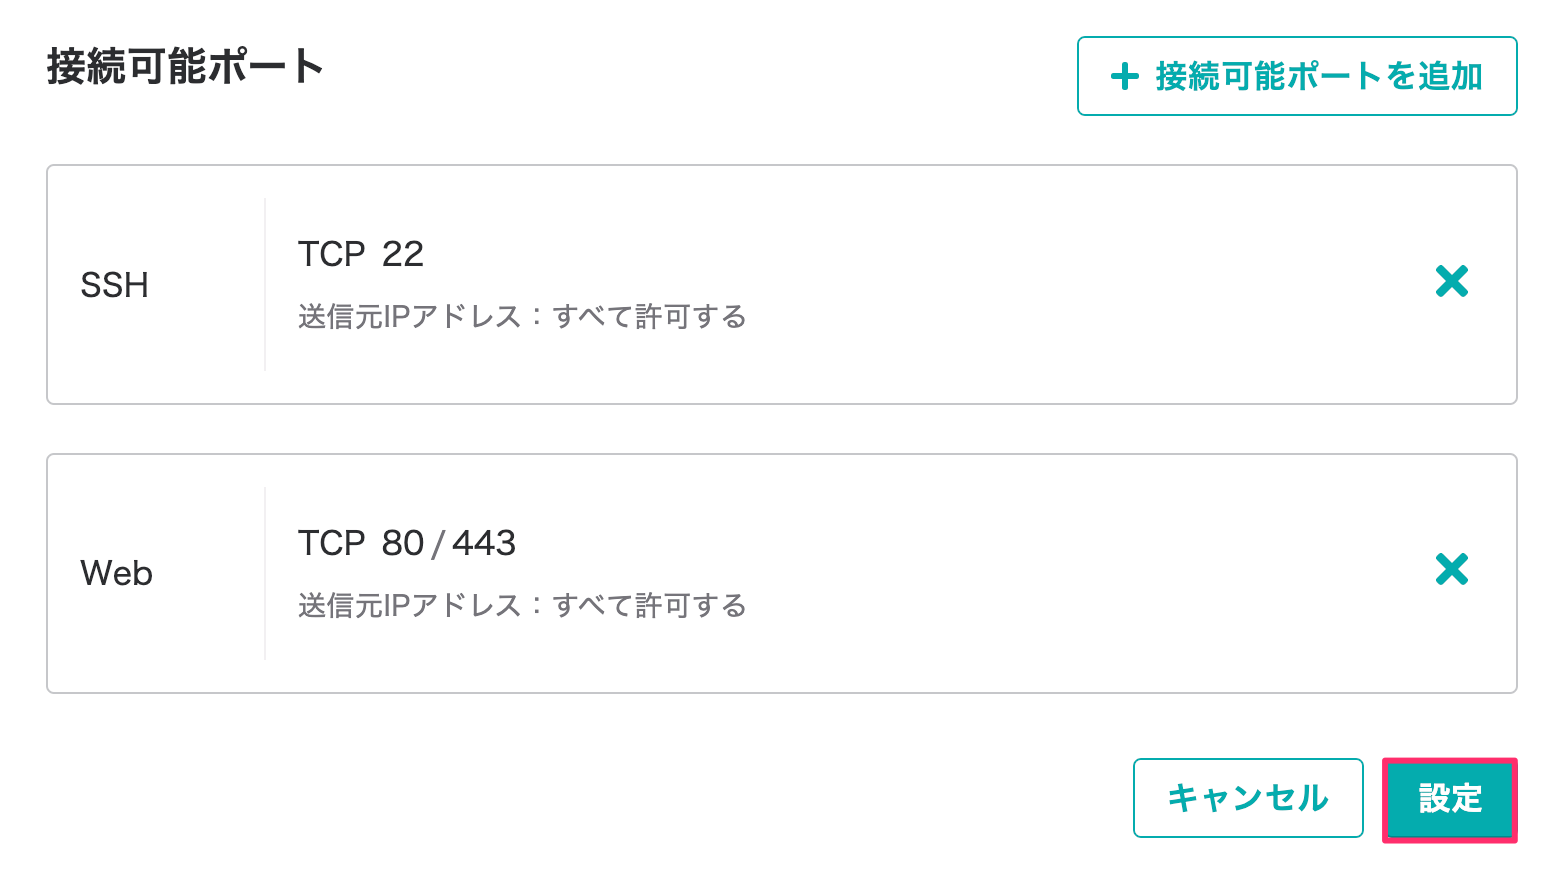
これでIPアドレスにブラウザからアクセスしても画面が見られるはず。
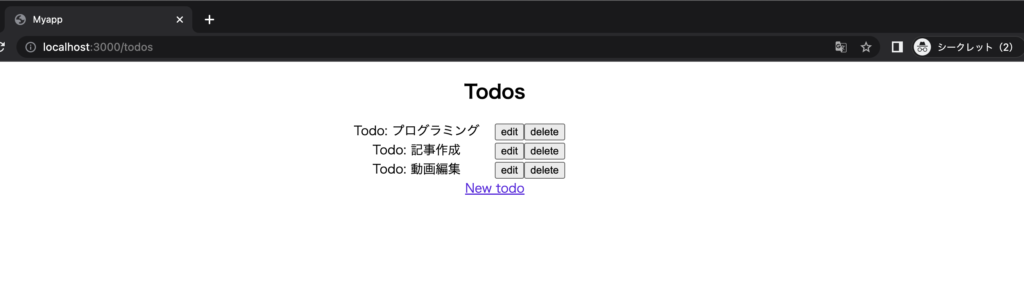
サーバーのIPアドレスにアクセス
サーバーのIPアドレスにアクセスするとNginxの画面が出てきました。
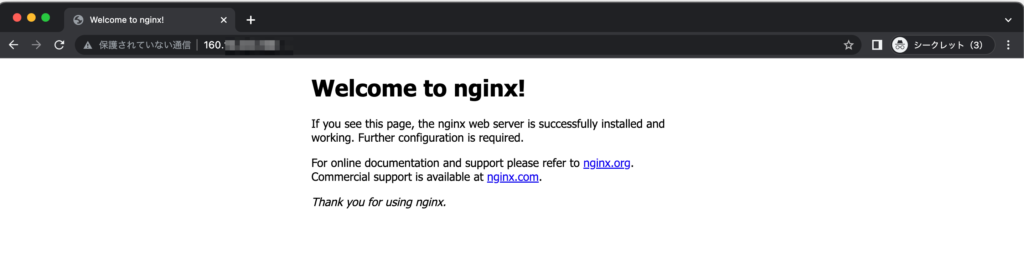
とりあえずNginxまではOKですね、必要なものを引き続きインストールしていきましょう。
データベース(Mysql)のインストール
MySQLをインストールします。
$ sudo apt install mysql-server

# 起動
$ sudo service mysql start
rootユーザーのパスワードを設定する
初期状態のrootパスワードは空なので設定します。
$ sudo mysql -u root -p
Enterでログインできます。

mysql> ALTER USER 'root'@'localhost' IDENTIFIED WITH mysql_native_password BY '<パスワード>';
mysql> FLUSH PRIVILEGES;
ユーザーを作成する
作業用のユーザーも作成しておきましょう。
mysql> CREATE USER 'ユーザー名'@'localhost' IDENTIFIED BY 'パスワード';権限も付与しておきます。
mysql> GRANT ALL PRIVILEGES ON * . * TO 'ユーザー名'@'localhost';
mysql> FLUSH PRIVILEGES;
全部の権限与えたけど、必要に応じてユーザー権限を調整しましょう。
データベースの作成
Djangoアプリで使うデータベースを作成します。
mysql> create database 〇〇;ただ思ったけど、railsからデータベースってコマンドで作れますよね。railsからコマンドで作ってもここで作ってしまってもいいですね。
Railsアプリケーションをサーバーにアップロードする
FTP接続したらローカルにあるRailsのアプリをアップロードします。不要なフォルダはアップロードしなくてOK。
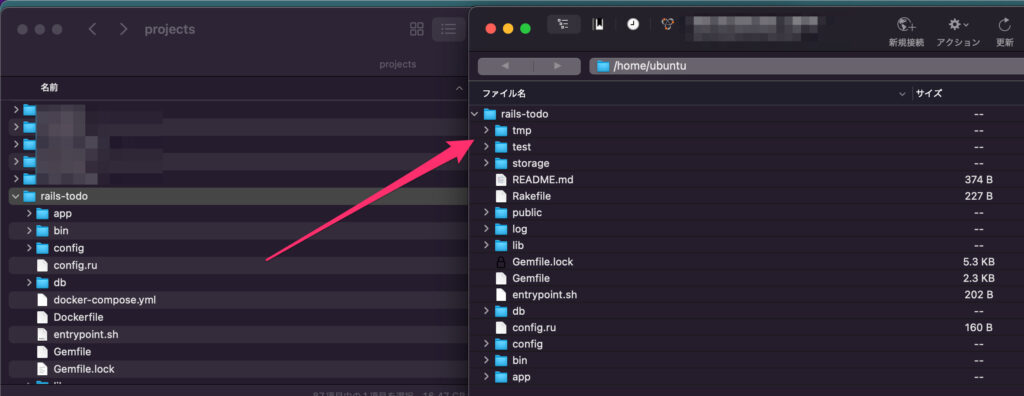
今回は/home/ubunts配下にアップロードしました。ubuntu初期ユーザーだし他のユーザー作った方がいいだろうけど、面倒なのでこれでいきます。
アプリケーションの設定をする
データベース設定
railsアプリケーションからmysqlにアクセスできるように設定を書き換えます。
$vim database.yml

production:
  <<: *default
  database: 作成したデータベース名
  username: 作成したデータベースのユーザー名
  password: 作成したユーザーのパスワード
bundle installする
bundle installを行います。libmysqlclient-devはmysql2のインストールに失敗したので、入れてみたら通りました。
# mysql2のインストールが失敗したのでインストール。
$ sudo apt install -y libmysqlclient-dev

# productionだけインストール
$ bundle install --without test development

# railsコマンドないよと言われたのでインストール
$ gem install rails
$ rbenv rehash
Migrateを行う
migrateします。データベースとうまく繋がっていればできるはずです。
$ rails db:migrate RAILS_ENV=production
== 20221201052947 CreateTodos: migrating ======================================
-- create_table(:todos)
   -> 0.0203s
== 20221201052947 CreateTodos: migrated (0.0207s) =============================
これでrailsからmysqlに接続はできましたね。
Unicorn設定
config/unicorn.rbにunicornの設定ファイルを作成します。
$ vim /home/ubuntu/rails-todo/config/unicorn.rbworker_processes Integer(ENV["WEB_CONCURRENCY"] || 3)
timeout 15
preload_app true
listen '/home/ubuntu/rails_todo/tmp/unicorn.sock'
pid '/home/ubuntu/rails_todo/tmp/unicorn.pid'
before_fork do |server, worker|
Signal.trap 'TERM' do
puts 'Unicorn master intercepting TERM and sending myself QUIT instead'
Process.kill 'QUIT', Process.pid
end
defined?(ActiveRecord::Base) and
ActiveRecord::Base.connection.disconnect!
end
after_fork do |server, worker|
Signal.trap 'TERM' do
puts 'Unicorn worker intercepting TERM and doing nothing. Wait for master to send QUIT'
end
defined?(ActiveRecord::Base) and
ActiveRecord::Base.establish_connection
end
stderr_path File.expand_path('log/unicorn.log', ENV['RAILS_ROOT'])
stdout_path File.expand_path('log/unicorn.log', ENV['RAILS_ROOT'])listenとpidは自分のアプリケーションのパスにしておきましょう。
lib/tasks/unicorn.rakeにも起動してくれるファイルを作っておきます。
$ vim /home/ubuntu/rails-todo/lib/tasks/unicorn.rakenamespace :unicorn do
# Tasks
desc "Start unicorn"
task(:start) {
config = Rails.root.join('config', 'unicorn.rb')
sh "unicorn -c #{config} -E production -D"
}
desc "Stop unicorn"
task(:stop) {
unicorn_signal :QUIT
}
desc "Restart unicorn with USR2"
task(:restart) {
unicorn_signal :USR2
}
desc "Increment number of worker processes"
task(:increment) {
unicorn_signal :TTIN
}
desc "Decrement number of worker processes"
task(:decrement) {
unicorn_signal :TTOU
}
desc "Unicorn pstree (depends on pstree command)"
task(:pstree) do
sh "pstree '#{unicorn_pid}'"
end
# Helpers
def unicorn_signal signal
Process.kill signal, unicorn_pid
end
def unicorn_pid
begin
File.read("/home/ubuntu/rails_todo/tmp/unicorn.pid").to_i
rescue Errno::ENOENT
raise "Unicorn does not seem to be running"
end
end
endFile.readの部分は自分のアプリケーションのパスにしておきましょう。
これでunicornを起動します。
$ rake unicorn:start起動確認するとちゃんと起動しましたね。
ps -ef | grep unicorn | grep -v grep
ubuntu     66199       1  1 08:36 ?        00:00:01 unicorn master -c /home/ubuntu/rails-todo/config/unicorn.rb -E production -D
ubuntu     66201   66199  0 08:36 ?        00:00:00 unicorn worker[0] -c /home/ubuntu/rails-todo/config/unicorn.rb -E production -D
ubuntu     66202   66199  0 08:36 ?        00:00:00 unicorn worker[1] -c /home/ubuntu/rails-todo/config/unicorn.rb -E production -D
ubuntu     66204   66199  0 08:36 ?        00:00:00 unicorn worker[2] -c /home/ubuntu/rails-todo/config/unicorn.rb -E production -D
失敗したらlog/unicorn.logっていうのがあると思うので見てみるといいです。
Nginx設定
Nginxの設定ファイルを作成します。
$ vim /etc/nginx/conf.d/raild_todo.confupstream unicorn {
server unix:/home/ubuntu/rails-todo/tmp/unicorn.sock;
}
server {
listen 80;
server_name IPアドレス;
access_log /var/log/nginx/access.log;
error_log /var/log/nginx/error.log;
root /home/ubuntu/rails-todo/public;
client_max_body_size 100m;
error_page 404 /404.html;
error_page 500 502 503 504 /500.html;
try_files $uri/index.html $uri @unicorn;
location @unicorn {
proxy_set_header X-Real-IP $remote_addr;
proxy_set_header X-Forwarded-For $proxy_add_x_forwarded_for;
proxy_set_header Host $http_host;
proxy_pass http://unicorn;
}
}server_nameにはIPアドレス、rootには自分のアプリケーションパスを入力します。
これでnginxを再起動させておきましょう。
$ sudo systemctl restart nginxNginxとUnicornの起動ユーザーを合わせる
nginxとunicornの起動ユーザーが合わないと失敗するので確認しておきます。
$ ps -eaf | grep nginx

root       66538       1  0 08:47 ?        00:00:00 nginx: master process /usr/sbin/nginx -g daemon on; master_process on;
www-data   66539   66538  0 08:47 ?        00:00:00 nginx: worker process
www-data   66540   66538  0 08:47 ?        00:00:00 nginx: worker process
ubuntu     66571   63708  0 08:47 pts/3    00:00:00 grep --color=auto nginx


$ ps aux | grep unicorn
ubuntu     66199  0.1 10.2 233424 102324 ?       Sl   08:36   0:01 unicorn master -c /home/ubuntu/rails-todo/config/unicorn.rb -E production -D
ubuntu     66201  0.0  9.5 233592 94592 ?        Sl   08:36   0:00 unicorn worker[0] -c /home/ubuntu/rails-todo/config/unicorn.rb -E production -D
ubuntu     66202  0.0  9.5 233592 94592 ?        Sl   08:36   0:00 unicorn worker[1] -c /home/ubuntu/rails-todo/config/unicorn.rb -E production -D
ubuntu     66204  0.0  9.4 233592 94136 ?        Sl   08:36   0:00 unicorn worker[2] -c /home/ubuntu/rails-todo/config/unicorn.rb -E production -D
unicornはubuntuが実行しているけど、nginxはそうでもないようなのでubuntuに統一します。
$ sudo vim /etc/nginx/nginx.conf
#user www-data;
user ubuntu;
これでnginxもubuntuにしました。ただここら辺よくわかっていないです。こうした方がいいっていうのがおそらくあるだろうと思います。
$ sudo service nginx restartPrecompileする
precompileしないと画面が表示されなかったのでします。config/environments/production.rbのcompileをtrueに変更。
  #config.assets.compile = false
  config.assets.compile = true
precompileします。
$ rails tmp:cache:clear
$ rake assets:precompile RAILS_ENV=production
ただprecompileするとエラー起きましたね。
rake aborted!
Sprockets::ArgumentError: link_tree argument must be a directory
/home/ubuntu/rails-todo/app/assets/config/manifest.js:4
manifest.jsを覗いてみると存在しないフォルダを指定していたので、それを消すととりあえず動きました。ただここもちょっとよくわからないですね。うーん。
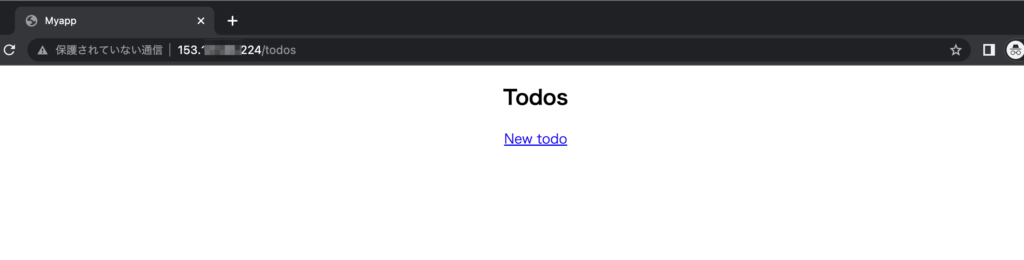
ブラウザからアクセス
ブラウザからIPアドレスにアクセスしてみるとちゃんと動きましたね。
まとめ
さくらのVPSでRailアプリケーションを動かすっていうことをやってみたけど、やっぱりこういうデプロイ系はしんどいですね。環境作らないといけないし、色々設定しないといけないですから。
今回は主にこんなことをしました。
- サーバーを立てる(Ubuntu/1GB)
- ローカルのRailsアプリをアップロードする
- Nginxをインストール・設定する
- MySQLをインストール・設定する
- Unicornをインストール・設定する
Railsのデプロイ作業慣れている人ならいいかもしれないけど、大体の人は調べつつになるかと思います。
さくらのVPS![]() は2週間無料で使えるのでよかったら試してみてください。
は2週間無料で使えるのでよかったら試してみてください。